以下のオプションのいずれかを選択して教材を共有することができます。[br][list][*]共有リンクを取得する。[/*][*]Google Classroom で教材を共有する。[/*][*]GeoGebra Timeline に教材を説明付きで掲載する。[/*][/list]
提供されたリンクをコピーして同僚や生徒・学生に送信することで、リンクを介して教材を共有できます。[br]閲覧リンクを持っている人は誰でもあなたの教材を閲覧することができ、ログインや[i]GeoGebra[/i]のアカウントは必要ありません。[br][list][*]右上の[img]https://wiki.geogebra.org/uploads/thumb/4/41/Icon-menu.svg/16px-Icon-menu.svg.png[/img]ボタンを押すと、[i]詳細[/i] のアイコンが表示されます。[i]詳細 のページを開き、共有を選択します.[/i][/*][*]ダイアログが開き、共有のリンクが表示されます。[br][/*][/list][br][b]注:[/b]教材カードの[img]https://wiki.geogebra.org/uploads/thumb/4/41/Icon-menu.svg/16px-Icon-menu.svg.png[/img]ボタンを押しても、[i]詳細[/i]オプションを見つけることができます。
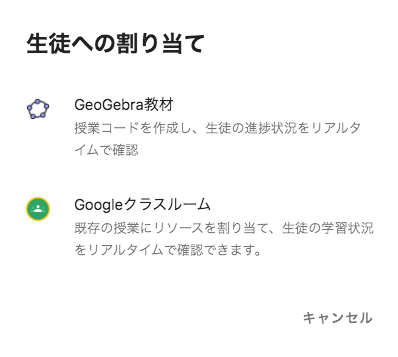
ワークシートやブックが開かれている場合、右上の [i]割り当て[/i] ボタンを選択するとGoogle Classroomで教材を共有することができます。[list][*]「Google Classroom」オプションを選択します。[/*][*]レッスンのタイトルを選び、必要なだけのクラスに割り当てます。[/*][*]課題をすぐにクラスに投稿したい場合は、[i]割り当て [/i]を選択し、「完了」をクリックします。[/*][/list]
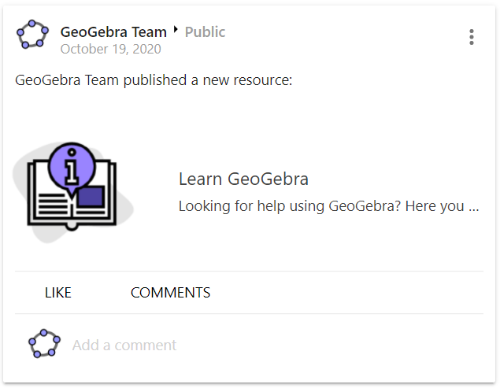
教材を共有するには、[i]GeoGebraタイムライン[/i]に投稿します。[br]さらに、共有した教材に短い説明や他のコメントを追加することができます。[br][br]さらに、あなたをフォローしている他のユーザーは、あなたの教材を閲覧し、[i]ニュースフィード[/i]上でその投稿に「いいね」やコメントを付けることができます。
他のユーザーがあなたの教材を編集できるようにします。これは、[i]ワークシート[/i]や[i]ブック[/i]の作成を一緒に行いたい場合に便利です。[br][br]教材の[i]詳細[/i]ページを開き、[i]アクセスの設定[/i]を選択します。[br]ここでは、教材の公開の設定を変更したり、閲覧リンクを取得することもできます。[br]他のユーザーに編集権を与えるには、 [i]編集用リンク[/i] にチェックを入れ、他のユーザーと共有できるリンクを取得し、編集権を与えることができます。[br][br]また、教材を共有したいユーザーを1人以上追加するには、下の入力欄にユーザー名またはメールアドレスを入力し、[i]ユーザーの追加 [/i]を押します。各ユーザーのドロップダウンメニューから、[i]オーナー、編集可能、閲覧可能 [/i]のいずれかの権利を選択することができます。[br][br][b]注:[/b]教材を閲覧または編集するユーザーを追加すると、その教材はユーザーの教材集ページの [i]私の教材[/i] タブとプロフィールページの [i]教材集[/i] タブに表示されるようになります。[br][br]教材の[i]アクセスの設定[/i]で、ユーザーの権利の横にある [img]https://wiki.geogebra.org/uploads/thumb/8/8c/Menu-edit-delete.svg/16px-Menu-edit-delete.svg.png[/img][i]削除[/i] ボタンを押すことで、いつでもユーザーの閲覧・編集権限を削除することができます。[br]
以下の項目は,GeoGebraプラットフォームの仕様の変更により出来なくなりました.
If an [i]Activity[/i] or [i]Book [/i]is open, you will find the [img width=20,height=20]https://lh3.googleusercontent.com/0DEchxs5mgzcNCuodD9lah11gLTDnUwrCX4SO3k0-mm5i5fTMh7pwhpFlGhwzaRduVNxVfG9489ck-um0gu54gTnK3KnkcVpgsSy6UdpDqNYPIVNjatRj8lCcgtX4lYFCc9wWTTa[/img] [i]Share[/i] icon after selecting the [img]https://wiki.geogebra.org/uploads/thumb/4/41/Icon-menu.svg/16px-Icon-menu.svg.png[/img][i]More [/i]button in the upper right corner. Pressing the [img width=20,height=20]https://lh3.googleusercontent.com/0DEchxs5mgzcNCuodD9lah11gLTDnUwrCX4SO3k0-mm5i5fTMh7pwhpFlGhwzaRduVNxVfG9489ck-um0gu54gTnK3KnkcVpgsSy6UdpDqNYPIVNjatRj8lCcgtX4lYFCc9wWTTa[/img] [i]Share[/i] button opens a dialog, where you can choose one of the following options to share the resource:[br][list][*]Get a sharing link.[/*][*]Choose or create a group where you can post the resource.[/*][*]Share the resource on other platforms (OneNote, Google Classroom).[/*][*]Post the resource on your [i]GeoGebra Timeline [/i]with a description.[br][/*][/list][b]Note: [/b]You can also press the [img]https://wiki.geogebra.org/uploads/thumb/4/41/Icon-menu.svg/16px-Icon-menu.svg.png[/img][i]More[/i] button on the resource card to find the [i]Share[/i] option.
Create a [i]New Group[/i] or choose an [i]Existing Group [/i]which you want to share the resource with. [br]Pressing the [i]Share [/i]button and choosing a group redirects you to the tab [i]Posts[/i] of the group. Press the [i]Post [/i]button so that all members can see the resource.[br][br]Have a look at the [url=https://www.geogebra.org/m/rQrbooeq][i]GeoGebra Groups [/i][/url][url=https://www.geogebra.org/m/rQrbooeq]tutorial[/url] to learn more about how to use [i]GeoGebra Groups [/i]for sharing resources with other users[i].[/i]
[left]You can also choose either one of the following options to share a public resource with others:[/left][list][*][icon]https://www.geogebra.org/images/general/big/icon-google-classroom-hover.png[/icon] Google Classroom: When selecting Google Classroom, you can choose a class and add optional instructions to post the resource in your classroom.[br][br][/*][*][icon]https://tube.geogebra.org/images/onenote_32.png[/icon] OneNote: When selecting OneNote, a link is copied to the clipboard, ready for being pasted into OneNote.[/*][/list]