
Developing fun games and puzzles with 3D printing for STEAM

Teaching ressources for STEAM lessons: Printable games for a variety of applications in the classroom - aiming at providing fun and knowledge. 3D printing in STEAM education can be valuable especially for creating custom teaching material. Moreover, it can be used to create tangible visualisations of virtual concepts as are used in mathematics. As a motivational and learning bonus, it utilizes concepts of constructivism.
Table of Contents
- About the Project
- Aim of the Project
- aMazing Patterns
- Edges are aMazing
- Activity/Lesson/Workshop planning template
- A Puzzle Overview
- About 3D printing
- About 3D Printing
- Creating a 3D printable model
- From GeoGebra to Printable Puzzle
- Examples of 3D printing in the classroom
- Printable Puzzles
- Cube Puzzles
- Cubo para Marcela UFTM
- Voronoi Puzzles
- Voronoi Cones
- Fractal Puzzles
- Fractal curves - points and edges
- Triangle Puzzles
- Create one Logifaces part
- Puzzle Square - Equilateral triangle
- Cookie Cutter Puzzles
Aim of the Project
A toolkit for workshops, presentations, fun in the classroom aiming at collaboration and problem solving
The projects aim is to develop both guidelines to develop games as well as create game ideas with guidelines how to use them.[br][br]The guidelines and ideas will include concepts for the processes based on our previous work and on new ideas. Several steps could lead to the production of a mathematical puzzles which consist of:[list=1][*]Developing an idea for a puzzle[br] [/*][*]Designing 3-dimensional models for 3D printing[br] [/*][*]Produce the model[br] [/*][*]Observeand try out the outcome testing whether the result is satisfactory or the process has to be repeated[br][/*][/list][br]The goals for a successfully developed puzzle are:[br][br][list=1][*]Increase geometric vocabulary[br] [/*][*]Actively use and understand guidelines by the JKU team[br] [/*][*]Use Soft skills to effectively collaborate[br] [/*][*]Improve creative problem solving [br] [/*][*]Improve the visibility of the JKU by taking home self-made items[br] [/*][*]Attract especially young people by using emerging technologies[br] [/*][*]Improve ability to connect abstract concepts and concrete items[br][br][/*][/list][br]
About 3D Printing
What does 3D printing mean?
3D printing is a technology for additive manufaturing. In contrast to eg. CNC milling, there is no material taken away to produce a part but material is added until a part is built.[br]It can be compared a bit to the difference between a sculpture where a person is carved out of a rock like Michelangelos David in contrast to a snowman where snow is collected in balls until a hat and a nose can be attached.[br]Material is usually added in layers, like a cake often consists of layers that are connected by some cream. For 3D printing, the layers can be connected in different ways, regarding on the technology.[br]
How old is 3D printing?
For many people, 3D printing is a very new technology which they only discovered recently. However, the for some surprising truth is that 3D printing is a rather old technology. One technologiy - Stereolithography - was developed in 1981 and patented in 1984. The first program for developing 3D models was available since 1983 meaning it is even older than the World Wide Web which was developed in 1989.[br]In fact, 3D printing is already used for prototyping quite often in the industry. It was just not widely used by end users as of yet.[br][br]
Why is 3D printing getting more popular?
In the year 2009, the patent for the Fused Deposition Modeling technology expired. As a result, enthusiasts especially from the field of mathematics started to develop cheap versions of machines using this technology. The now cheaper machines lead to a dropping of prices from 20.000€ and above to only a few hundred within only a decade for really affordable machines.[br]Other patents expired in the last years allowing more affordable machines as well.[br]Not only did prices get more affordable, also the technologies themselves developed and gained better quality by the advent of using 3D printing for the quick production of items or prototypes. And as 3D printing is now more in the focus, more interesting fields like sophisticated materials or new fields of usage open up.
Technology Overview
Technologies can be cathegorized by their used materials and the way they add each layer of material to existing hardened material. Materials cover powders, liquids, endless filaments, granulates, and more. What they all currently share: a layer of material each is hardened and fused with another layer of material until an entire item can be taken out of the machine.[br][br]
FDM/FFF - adding layers until an item is produced
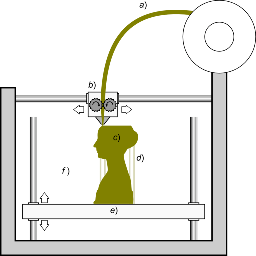
In FFF, a filament which is an endless material string [b]a)[/b] of a thermoplast material is transported to a head that heats up the material [b]b)[/b] and then melts and extrudes it through a nozzle layer per layer [b]c)[/b]. Often, the platform also moves [b]e)[/b]. This technology needs support structures [b]d)[/b] at certain angles to avoid falling layers. Image by Scopigno R., Cignoni P., Pietroni N., Callieri M., Dellepiane M. (2017). "[url=http://vcg.isti.cnr.it/Publications/2017/SCPCD17/DigitalFabricationForCH.pdf]Digital Fabrication Techniques for Cultural Heritage: A Survey[/url]". Computer Graphics Forum 36 (1): 6–21. [url=https://en.wikipedia.org/wiki/Digital_object_identifier]DOI[/url]:[url=https://doi.org/10.1111/cgf.12781]10.1111/cgf.12781[/url].
FDM/FFF - Fused Deposition Modeling/Fused Filament Fabrication
The 3D printing technology which is very affordable and widely available is FDM or FFF which works basically like a glue pistol adding material layer per layer through a nozzle. The technology was developed by S. Scott and Lisa Crump who were part of the company Stratasys. The company Stratasys still holds the patent of the name FDM, thus the RepRap movement - a group of enthusiasts with mostly a mathematical background - created the name FFF which can be used without constraints.[br]This technology uses so called thermoplasts as material. A thermoplast is a material which melts when heated up, is then squeezed through a nozzle and afterwards hardens when cooling down. Often, those [br]thermoplasts are sold as filaments, long strings without any end in one color. [br]As explained before, each melted layer hardens in order to allow another layer to be extruded on top of the old layer. The precision of this technology relies heavily on the layer thickness and the nozzle diameter. The smaller both is, the slower but more accurate the production process is. FDM needs support material for overhangs usually bewtween 30 to 40 degrees.[br]Colors of FDM printed items have the color of the filament used. Most printers use one filament and thus produce items in one color.
SLA - Stereolithography
Developed in 1981 and patented in 1986 by Robert C. Hull, the oldest 3D printing technology uses a material that hardens when exposed to UV light by eg. a laser and is usually a photopolymer - resin is often used today as a material. This technology allows a very high precision. However, it needs to be postprocessed since the sun emits UV light leading to an ongoing hardening process turning it brittle over time. [br]Hull also developed the STL file format. The items produced have the color of the used photopolymer which is usually one color but since it has to have a coating due to the UV hardening, it can be colored afterwards. A variation is spraying photopolymer as droplets through a nozzle hardening the material directly afterwards using a UV lamp. This technology needs support since it is either produced within a liquid or [br]into air.
SLS/SLM - Laser Sintering/Laser Melting
This technology uses a powder, often a variation of Nylon and thus a bit flexible but still very robust, which is applied in layers in some kind of building space, heated up until right before melting together and [br]then shot at by lasers to heat up the material all the way up until they sinter or melt together. Afterwards, the material has to cool down and then can be dug out of the remaining material like a geologist would dig[br] out items from dust. Material only comes in Black, White and variations inbetween so usually, white material is print and the objects are then dyed to achieve colors. Support is not needed since below each layer of material is an existing powder layer of material.
Binderjetting/Inkjet 3D Printing
Just as SLS, Binderjetting uses powder as material, usually gypsum or ceramics but also metal is possible. The material is added in layers, afterwards glued together and then the item is dug out of the remaining [br]powder just as the SLS process - only without a cooldown phase. Furthermore, support is not needed and the majority of unused powder can just be reused.[br]Since the glue can be colored, this technology can produce colorful items.
Examples of 3D printing in the classroom
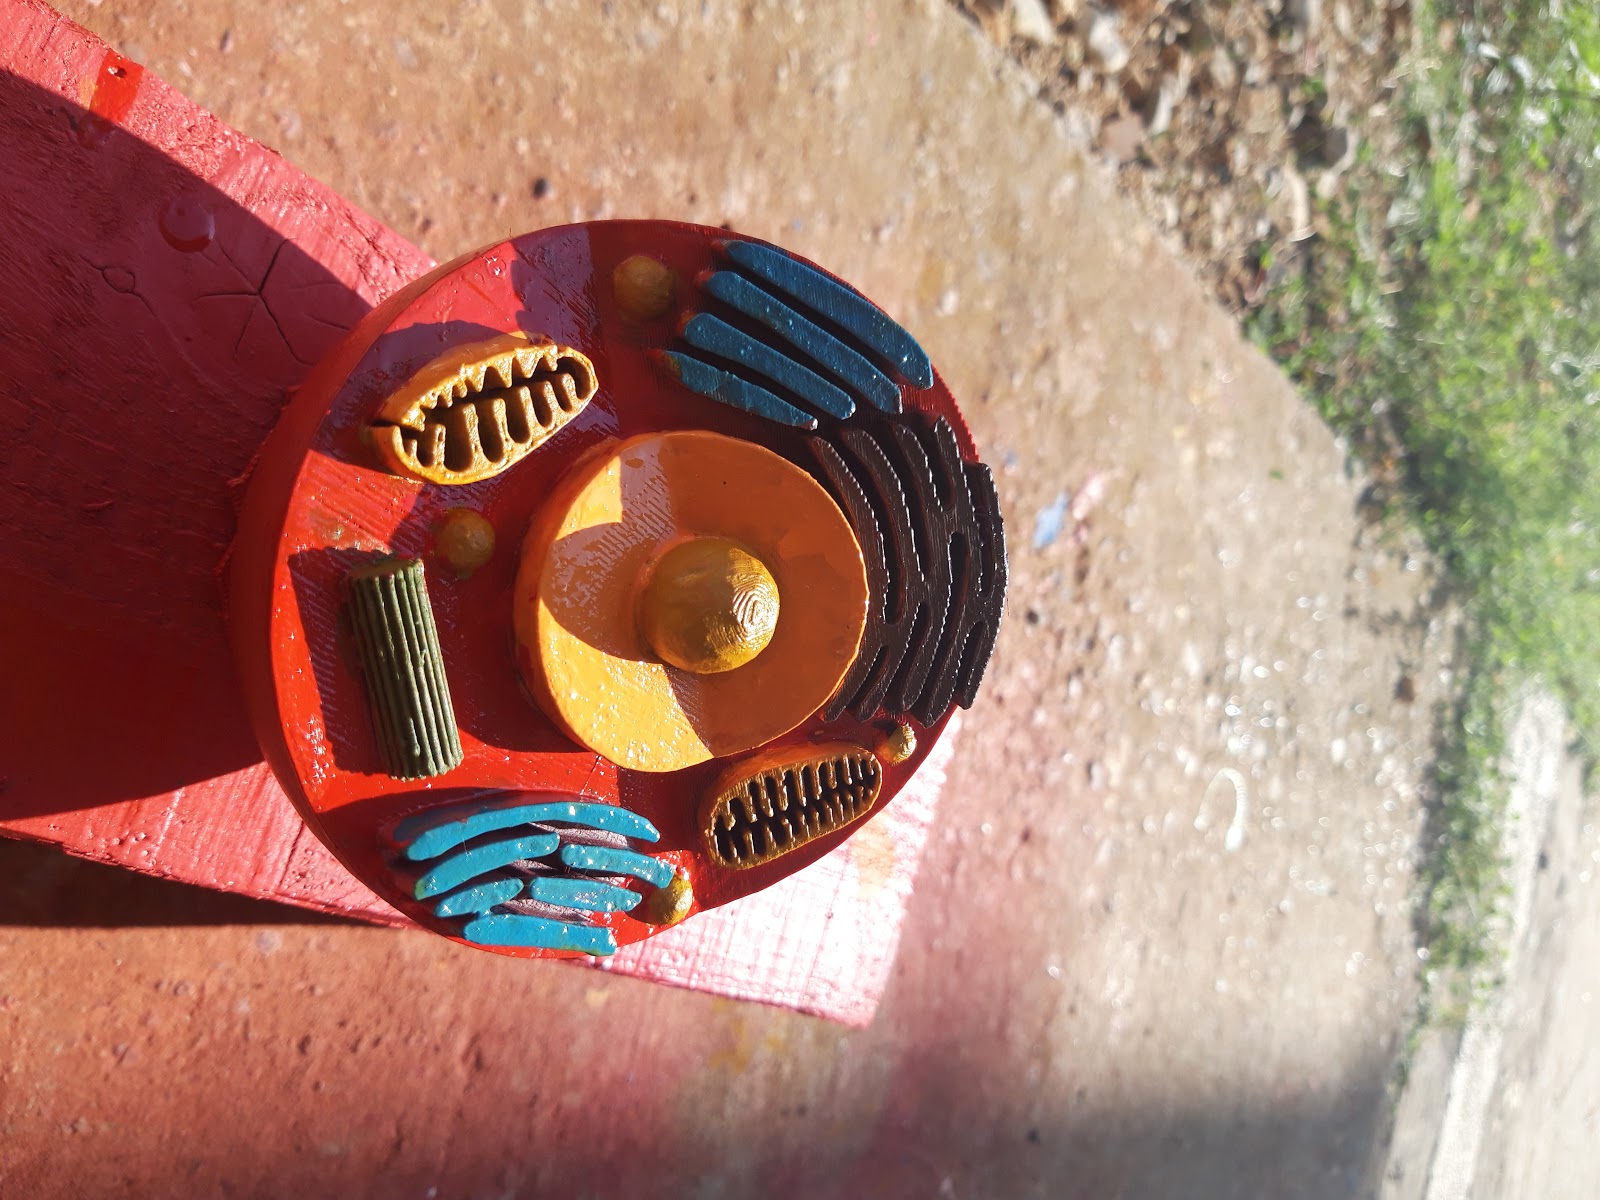
A cell
Printed and colored by students
[img width=325px;,height=244px;]https://lh3.googleusercontent.com/cmw2oeGrRVGVrmJp2N0Xl6dqoYrko2D7qBhZ2diDEAxnGSssytKYvI1-57VQcFPXqnw2JFxB3XuNQid_B5QXNfYKAiLHm1JZ3_hWC2JF6TAXOb-I0KyG2RN5TES-xY4fXu1SaihJhvI[/img]
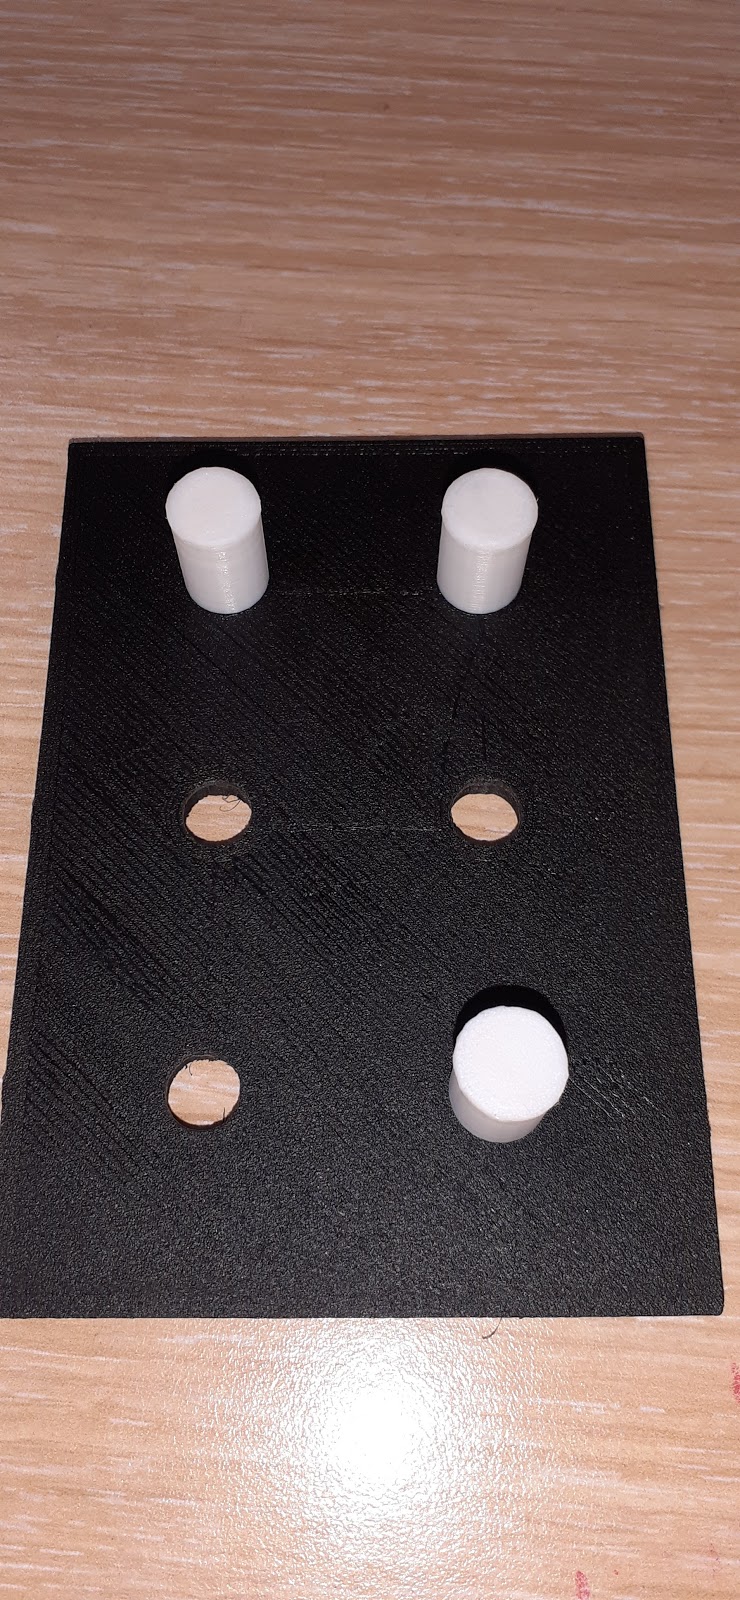
A tool to learn Braille
Developed by a school in Montenegro
[img width=109px;,height=236px;]https://lh4.googleusercontent.com/0q0fMSQNkkRkTP4WT3ewJdZkhyOO5hFuMoFreeKrK_lXrO44OaG_YqdesNMAw5zQq6uepAvzJUYJoT5GOaN82cOjF8fHAqB3DXN2CiqvH5-FflE-pP8g_gfOddME88C7jYjvT5axMAY[/img][img width=252px;,height=117px;]https://lh4.googleusercontent.com/FF68S2pzLb-K1zODQPw40CFjWJyKlQzgHqCL5EPA6hU1r4nPWXtVQN-bK2dAB60buafDTx1_g899VRxVLy5dWfsdTuC_lsSaaZBLuS3a9aO6PMTnPBZumuZNAqq0wWKeDxJGbbkzXMw[/img]
Geometrical Objects
Touch the mathematics!
[img width=289px;,height=140px;]https://lh5.googleusercontent.com/WV2pGq243jTKxa5XqE6jLdXXa_i4zbyglc7aEuQWRrqbIXeAe3asBi4Uiko0c_XzrpiXPNm-tnpWkMONUwthCwWESm8zGMHS-My9ZCLWh8qbtJSZVFwPfExK2eNrhwhj-B5Xc-6syE8[/img]
Molecules
Understand chemistry better.
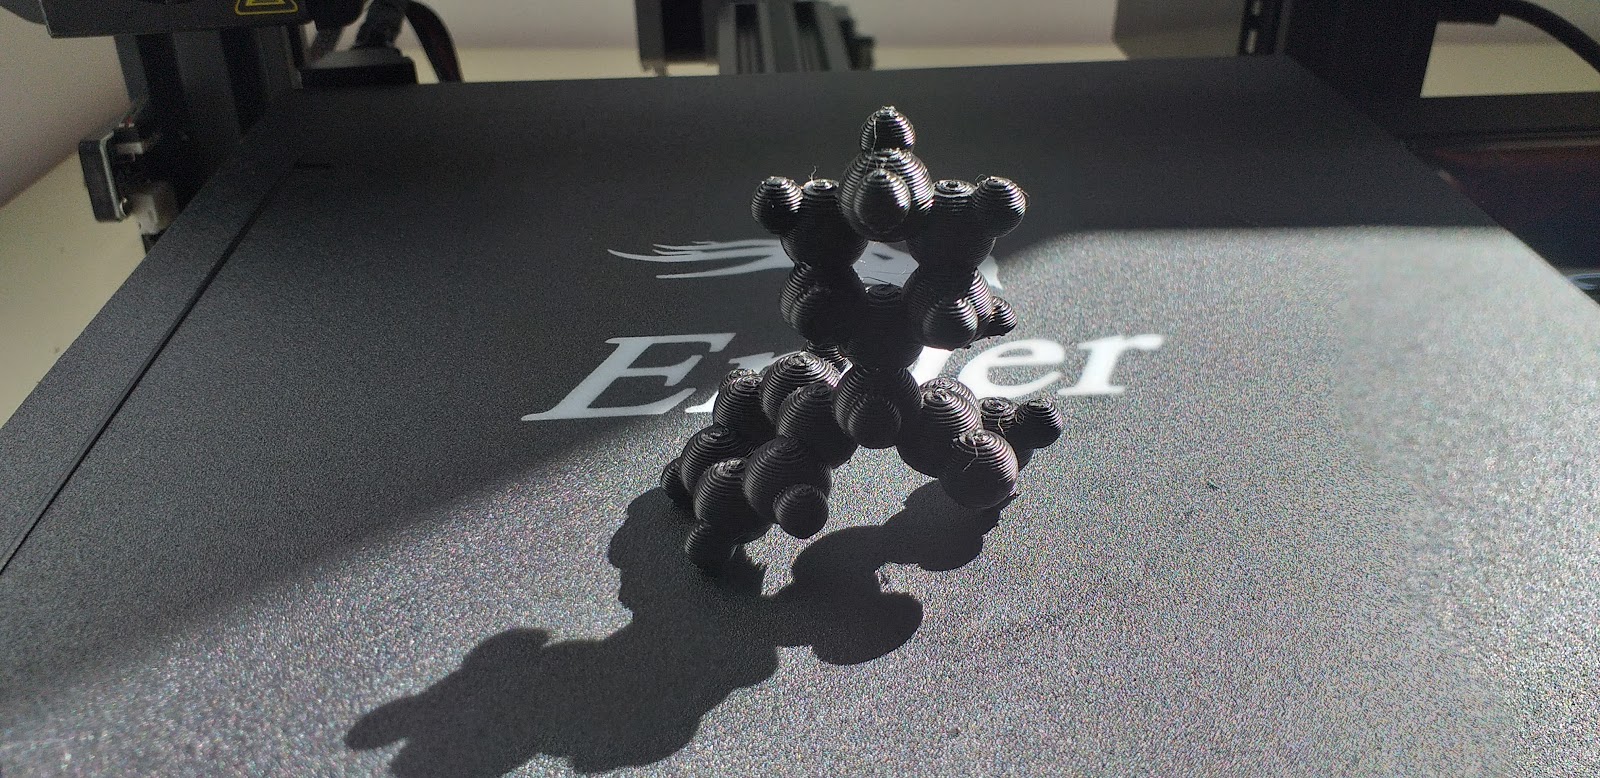
[img width=325px;,height=158px;]https://lh4.googleusercontent.com/BDLyp0LnjWDz11v4Md7OX1ooOl83lidtwKCh5IsGr0-2UoUzsNHGWKNrVO-tFF8Wp0CgeDh8BMqecB0ZGvcpolmRz2iuN_STKaxPwQl9UwnX6nVdfHPzK_RQetYFndkjrdjscSZViws[/img]
Cubo para Marcela UFTM
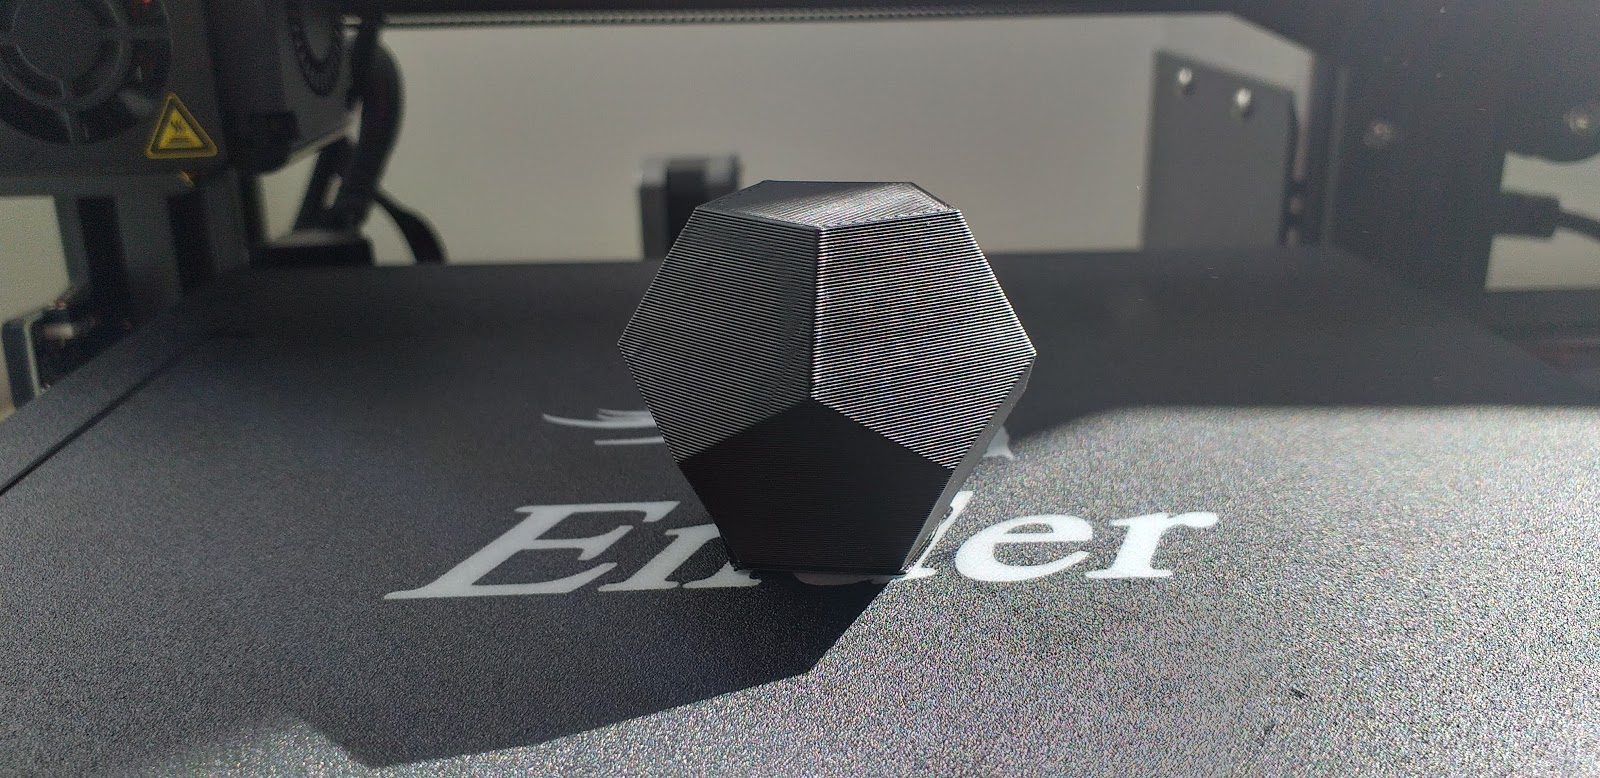
Voronoi Cones
A Voronoi diagram is a partitioning of a plane into regions such that each region contains one generating point and every point in a given region is closer to its generating point than to any other. GeoGebra has a built-in Voronoi function, where you input a list of points and GeoGebra will generate the Voronoi boundaries. After reading recently about how Voronoi diagrams can be generated through the use of cones, I decided to make this worksheet to demonstrate the idea. Each point represents the vertex of a cone. Move the points around and watch the pattern morph. The cones, when viewed directly from above, show the Voronoi pattern. Use the checkbox to show the Voronoi boundaries generated by the GeoGebra Voronoi function. Slide the slider to see the cones collapse or grow.
Fractal curves - points and edges
One possible solution

Fractal game workshop plan
Materialien: Puzzle-Teile (pro Kind eine Packung à 55 Teile)[br]Lernziele: Erkennen von Wiederholungen und Symmetrien, Wahrnehmungsschärfung gegenüber der Umwelt, Erkennen, dass Folgen und Reihen ebenfalls eine Form von Wiederholungen sind, Erlernen von mathematischen Beschreibungen von Wiederholungen in Form von Fraktalen, Mustern, Vergrößern und Verkleinern,….[br][list][*]Für Volksschule (VS, 6 - 10 Jahre): Symmetrien, Wahrnehmung, Flächen, Formen, ...[br][/*][*]Für Sekundarstufe 1 (Sek1, 10 - 14 Jahre): (Selbst-)Ähnlichkeit, zentrische Streckung[br][/*][*]Für Sekundarstufe 2 (Sek2, 14 bis 18 Jahre): Fraktale, Folgen und Reihen[br][/*][/list]Medien: evtl. Beamer zum Präsentieren der Fotos von Puzzles[br]Dauer: 2 Unterrichtseinheiten, jeweils eine an unterschiedlichen Tagen à 50 Minuten[br]Vorkommende Unterrichtsformen (Frontalunterricht, Einzelarbeit, Plenum, Gruppenarbeit)

Introduction
[list][*]Art: Frontal[/*][*]Dauer: 10 Minuten + 5 Minuten Puffer[/*][*]Material: Luftaufnahmen, Video, Bilder, Gemüse, Tannenzapfen, …[/*][/list]Lehrperson erklärt, dass sich manchmal in der Natur Dinge wiederholen und das grundsätzlich mathematisch beschreibbar ist. Bilder/Videos/... werden betrachtet. VS: (Video?) Einleitung etwas verlängern, Kindern Objekte mitbringen wie z.B. Tannenzapfen, durchgeben, regelmässigkeiten und Wiederholungen entdecken lassenSek1: Video, Bilder von Objekten die Wiederholungen beinhalten zeigen, Skalieren anhand von GeoGebra App zeigen, Quadrat & Rechteck (Zusammengesetzte/zerlegte Flächen) - Zerschneiden in kleine sich selbst ähnliche Teile in GeoGebra zeigenSek2: Video, Bilder von Objekten die Wiederholungen beinhalten zeigen, erklären von mathematischen Konzepten der Folgen und Reihen, Bedeutung von endloser Wiederholung erklären, Mandelbrotmenge...
Puzzling alone - find your personal solution
[list][*]Art: Einzelarbeit[/*][*]Dauer: 20 Minuten + 10 Minuten[/*][*]Material: Puzzle[/*][/list]Austeilen des Puzzles. Erläutern des Arbeitsauftrags. “Benutze dieses Puzzle um damit eine Wiederholung oder ein Muster zu legen, das du schön findest”. Hilfestellung darf nur “technisch” und nicht “inhaltlich” gegeben werden. Nach der Hälfte der Zeit, die Zeit ansagen. Nach 20 Minuten erneut 10 Minuten zusätzliche Zeit geben. Bei besonderer Geschwindigkeit: Lehrender geht hin, macht Foto, fordert Lernende auf, eine neue Lösung zu suchen.
Reflection - what did you like about your solution?
[list][*]Art: Diskussion Plenum[/*][*]Dauer: 15 Minuten[/*][*]Material: fertige Puzzle-Ergebnisse, Fotos der Puzzle-Ergebnisse am Beamer präsentieren[/*][*]Lernziele:[/*][/list]Die Lernenden stellen dem Rest der Klasse ihre Ergebnisse vor und erklären wie sie das Puzzle gelöst haben und was sie an ihrem Ergebnis schön finden (und warum).
Connecting puzzles
[list][*]Art: Gruppenarbeit[/*][*]Dauer: 30 Minuten[/*][*]Material: Puzzle[/*][*]Lernziele:[/*][/list]Die Lernenden finden sich in Teams zusammen oder werden vom Lehrenden in solche eingeteilt. Die Lernenden versuchen in dieser Einheit ihre beiden Ergebnisse zu kombinieren oder gemeinsam eine neue Lösung für die Aufgabe zu erarbeiten.
Follow up after the workshop
VS: “Geometrische Formen entstehen aus unterschiedlichen (anderen) geometrischen Formen”, nicht mehr nur “das Runde muss ins Runde”Sek1: SuS sollen mit Diegos Apps Dreiecke oder Ähnliches zerschneiden, sodass das Ergebnis selbstähnlich ist; Sek2: irgendwas mit Folgen und Reihen