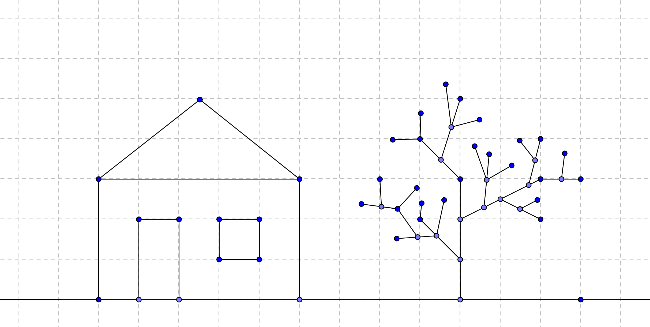
Draw a Picture with GeoGebra

How to draw a picture with GeoGebra
[size=100]Use the following selection of [i]Graphics Tools[/i] in order to draw a picture in the [img]https://wiki.geogebra.org/uploads/thumb/c/c8/Menu_view_graphics.svg/16px-Menu_view_graphics.svg.png[/img] [i]Graphics View [/i](e.g. square, rectangle, house, tree,…).[br][br][/size][table][tr][td][size=100][icon]https://tube.geogebra.org/images/ggb/toolbar/mode_point.png[/icon][/size][/td][td][size=100][b]Point tool[/b][br]Click on the [i]Graphics View[/i] or on an already existing object to create a new point.[/size][/td][td][/td][td][size=100][icon]https://wiki.geogebra.org/uploads/thumb/3/38/Menu-edit-undo.svg/120px-Menu-edit-undo.svg.png[/icon][/size][/td][td][size=100][b]Undo button[/b][br]Undo a construction step by step.[/size][/td][/tr][tr][td][size=100][icon]https://tube.geogebra.org/images/ggb/toolbar/mode_move.png[/icon][/size][/td][td][size=100][b]Move tool[/b][br]Drag a free object to change its position or move the entire [i]Graphics View[/i] by dragging the background.[/size][/td][td][/td][td][size=100][icon]https://wiki.geogebra.org/uploads/thumb/8/85/Menu-edit-redo.svg/120px-Menu-edit-redo.svg.png[/icon][/size][/td][td][size=100][b]Redo button[/b][br]Redo a construction step by step.[/size][/td][/tr][tr][td][size=100][icon]https://tube.geogebra.org/images/ggb/toolbar/mode_join.png[/icon][/size][/td][td][size=100][b]Line tool[/b][br]Click on the [i]Graphics View[/i] twice or on two already existing points.[/size][/td][td][/td][td][size=100][icon]https://tube.geogebra.org/images/ggb/toolbar/mode_translateview.png[/icon][/size][/td][td][size=100][b]Move Graphics View tool[/b][br]Click and drag the [i]Graphics View[/i] to adjust the visible part.[/size][/td][/tr][tr][td][size=100][icon]https://tube.geogebra.org/images/ggb/toolbar/mode_segment.png[/icon][/size][/td][td][size=100][b]Segment tool[/b][br]Click on the [i]Graphics View[/i] twice or on two already existing points.[/size][/td][td][/td][td][size=100][icon]https://tube.geogebra.org/images/ggb/toolbar/mode_zoomin.png[/icon][/size][/td][td][size=100][b]Zoom In tool[/b][br]Click on the [i]Graphics View[/i] to zoom in.[/size][/td][/tr][tr][td][size=100][icon]https://tube.geogebra.org/images/ggb/toolbar/mode_delete.png[/icon][/size][/td][td][size=100][b]Delete tool[/b][br]Click on an object to delete it.[/size][/td][td][/td][td][size=100][icon]https://tube.geogebra.org/images/ggb/toolbar/mode_zoomout.png[/icon][/size][/td][td][size=100][b]Zoom Out tool[/b][br]Click on the [i]Graphics View[/i] to zoom out.[/size][/td][/tr][/table]
Try it yourself...
What to practice
[list][*][size=100]How to select an already existing object.[br][u]Hint[/u]: When the pointer hovers above an object it highlights and the pointer changes its shape from a cross to an arrow. Clicking selects the corresponding object.[/size][/*][*][size=100]How to create a point that lies on an object.[br][u]Hint[/u]: The point is displayed in a light blue color. Always check if the point really lies on the object by dragging it with the mouse ([img]https://wiki.geogebra.org/uploads/thumb/8/83/Mode_move.svg/16px-Mode_move.svg.png[/img] [i]Move[/i] tool).[/size][/*][*][size=100]How to correct mistakes step-by-step using the [img]https://wiki.geogebra.org/uploads/thumb/3/38/Menu-edit-undo.svg/16px-Menu-edit-undo.svg.png[/img] [i]Undo [/i]and [img]https://wiki.geogebra.org/uploads/thumb/8/85/Menu-edit-redo.svg/16px-Menu-edit-redo.svg.png[/img] [i]Redo[/i] buttons.[/size][/*][/list][size=100][u]Note[/u]: Several tools allow the creation of points “on the fly”. This means that no existing objects are required in order to use the tool.[br][br][u]Example[/u]: The tool [img]https://wiki.geogebra.org/uploads/thumb/0/0c/Mode_segment.svg/16px-Mode_segment.svg.png[/img] [i]Segment[/i] can be applied to two already existing points or to the empty [img]https://wiki.geogebra.org/uploads/thumb/c/c8/Menu_view_graphics.svg/16px-Menu_view_graphics.svg.png[/img] [i]Graphics View[/i]. By clicking on the [img]https://wiki.geogebra.org/uploads/thumb/c/c8/Menu_view_graphics.svg/16px-Menu_view_graphics.svg.png[/img] [i]Graphics View[/i] the corresponding points are created and a segment is drawn in between them.[/size]
The Drag Test
Exploration Task
[size=100]The interactive construction below shows several squares constructed in different ways.[br][/size][list][*][size=100]Examine the squares by dragging ALL their vertices with the mouse.[/size][/*][*][size=100]Find out which of the quadrilaterals are real squares and which ones just happen to look like squares.[/size][/*][/list]
[*][size=100]Try to come up with a conjecture about how each square was created and write it down.[/size][/*][*][/*]
Discussion Questions
What is the difference between a drawing and a construction?
What is the Drag Test and why is it important for interactive constructions?
Why is it important to construct figures instead of just drawing them in a Dynamic Mathematics Software?[br]
What do we have to know about the geometric figure before we are able to construct it using Dynamic Mathematics Software?
